A session: from an idea to the cart¶
For you if you want to see working with edakit before you install anything. After this page you know what you type, what Claude asks and what is left for you outside the chat.
The board is the walkthrough's: a coin cell, a button and a red LED. Claude's answers are shortened. The walkthrough has every file, and each step links its page of the steps.
Once: add the plugin in Claude Code, install uv and ngspice.
A board for my desk: a coin cell, a push button and an LED. Press the button and the LED lights.
A new project: first the setup, in three forms.
Drawn in EasyEDA Pro or in KiCad?
- EasyEDA Pro (recommended): you create its project once by hand.
- KiCad 10: edakit writes the project.
EasyEDA Pro
Who makes it: JLCPCB, AISLER, PCBWay or Eurocircuits?
JLCPCB
Who solders: JLCPCB on the top side, or you?
JLCPCB, top side
How many sets, and which finish?
5 sets, the defaults
Private, a gift or for sale, and where?
for myself, in the EU
A budget?
none
The schematic drawn with labels or with wires?
labels
The requirements: now or later?
now
How big is the board?
fit to the parts
The project's name?
coin-cell-led
Documents that quote values, or scripts of its own?
none
Every file and key, each with its answer. Write them?
ok
edakit.toml, hardware/graph.json, docs/decisions.md written · edakit hook install"Press the button and the LED lights": how exactly?
- Only while held (recommended): nothing drawn at rest.
- Press on, press again off: a latch.
Only while held
Which coin cell?
CR2032
Which LED colour?
red
What kind of push button?
a small tactile one, SMD
Drafted in hardware/requirements.toml. R-1: while SW1 is pressed, D1 carries at least 1 mA, from a fresh cell down to 2.5 V. Only you accept them.
accept
edakit block add led · edakit part search · edakit check · edakit simA red LED, C84256: 1.22 mA from a used cell, 10.7 mA from a fresh one. Two findings are left for you.
PATH.reverse: a CR2032 put in upside down reaches R1 and D1. Protect against it?
- No protection (recommended): D1 blocks, 3.2 V against its rated 5 V.
- A Schottky diode in series: it costs 0.3 V, the margin a used cell needs.
No protection
LIM.i: held down, SW1 draws 10.7 mA from a fresh cell. It is rated 3 mA continuous, 15 mA in pulses.
- Accept it: a press is short (recommended).
- A pulse limit per load.
Accept it
Both in docs/decisions.md, with reason and date.
edakit stock · edakit costJLCPCB places the holder BT1 only in Standard assembly: 52.60 USD for five boards instead of 20.65.
- You solder BT1 by hand, five holders in the LCSC cart (recommended).
- Standard assembly.
- A Lian Xin holder: its drawing does not mark plus.
I solder it
edakit schematic draw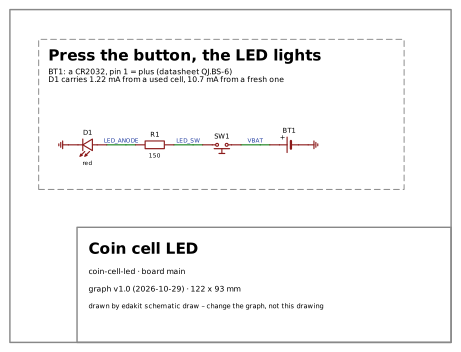
A checked circuit and its drawing, enough to wire it by hand. Stop here, or on to a board?
a board
The electrical and the regulatory reviewer check it now, each in a context of its own. The regulatory review is support, not legal advice.
Who uses the board? The cell comes out by hand, and a swallowed coin cell burns.
- Adults at a desk, out of reach of small children (recommended).
- Children: then a holder that needs a tool.
Adults at a desk
R-2, dark while nobody presses, has no number. At most 1 µA from the cell?
yes
Fixed. Both looked again and signed.
Install EasyEDA Pro and import its bridge extension. Create the project by hand: File → New → Project, "coin-cell-led". †
† In EasyEDA three clicks are left, each reported to EasyEDA and gone once fixed: the project (issue #45), the extension at each update (#47), the project tree once after a start (#52). KiCad needs none. Design → Import Changes is gone already (#46).
Start a new session and type /edakit:pcb-round.
The board's size and shape? And what must stay where a person touches or looks?
Round, please.
Ø 44 mm. The cell nearly in the middle, 10 mm above it to lever it out. Button, LED and resistor below.
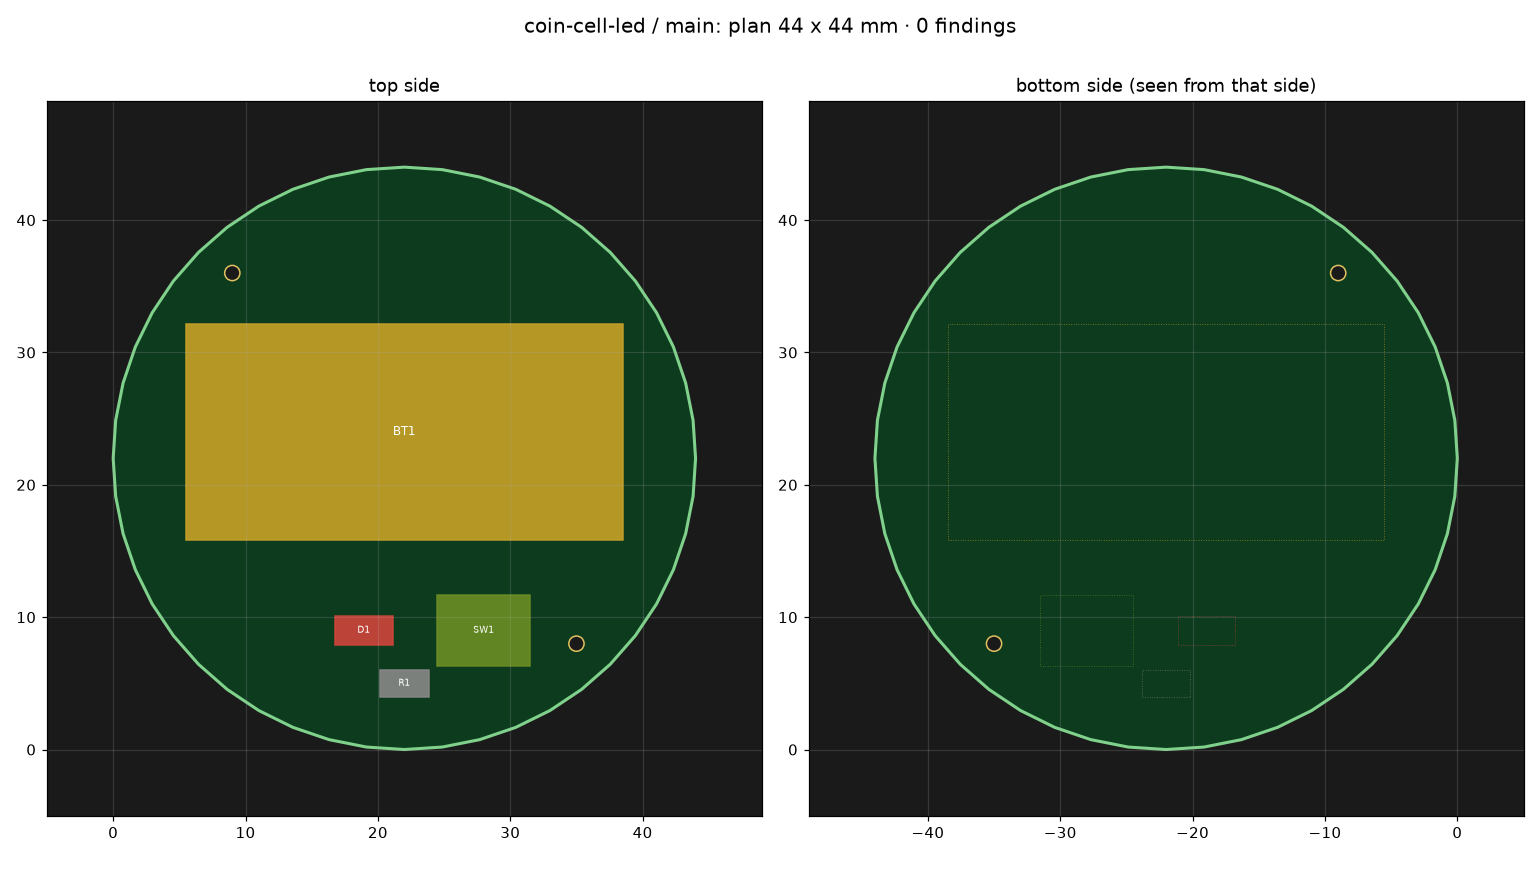
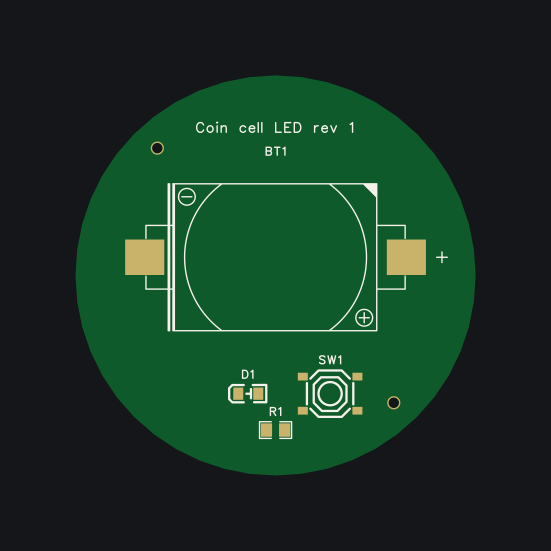
Release it and put it into the JLCPCB cart.
edakit gate --eda: RELEASEDShip to which country, and how?
your answer
/edakit:cart: every field set and read back, the quote checked against the estimate. Stopped at the cart.Check D1's cathode in JLCPCB's preview, then order and pay.
When the boards arrive: solder BT1, test each board against the list.